Drive Test
Overview
The Drive Test is a “Ramp Test” style test, but instead of a pre-defined Test Time or Ramp Rate, it applies load based on the vehicle’s Test Weight and acceleration rate, mimicking real road load. A heavier car with less power will take longer to complete the test than a lighter car with more power — just as it would on the road.
To access it, click the Drive Test tab at the top of any screen in the software:

A blank Drive Test screen looks like this:
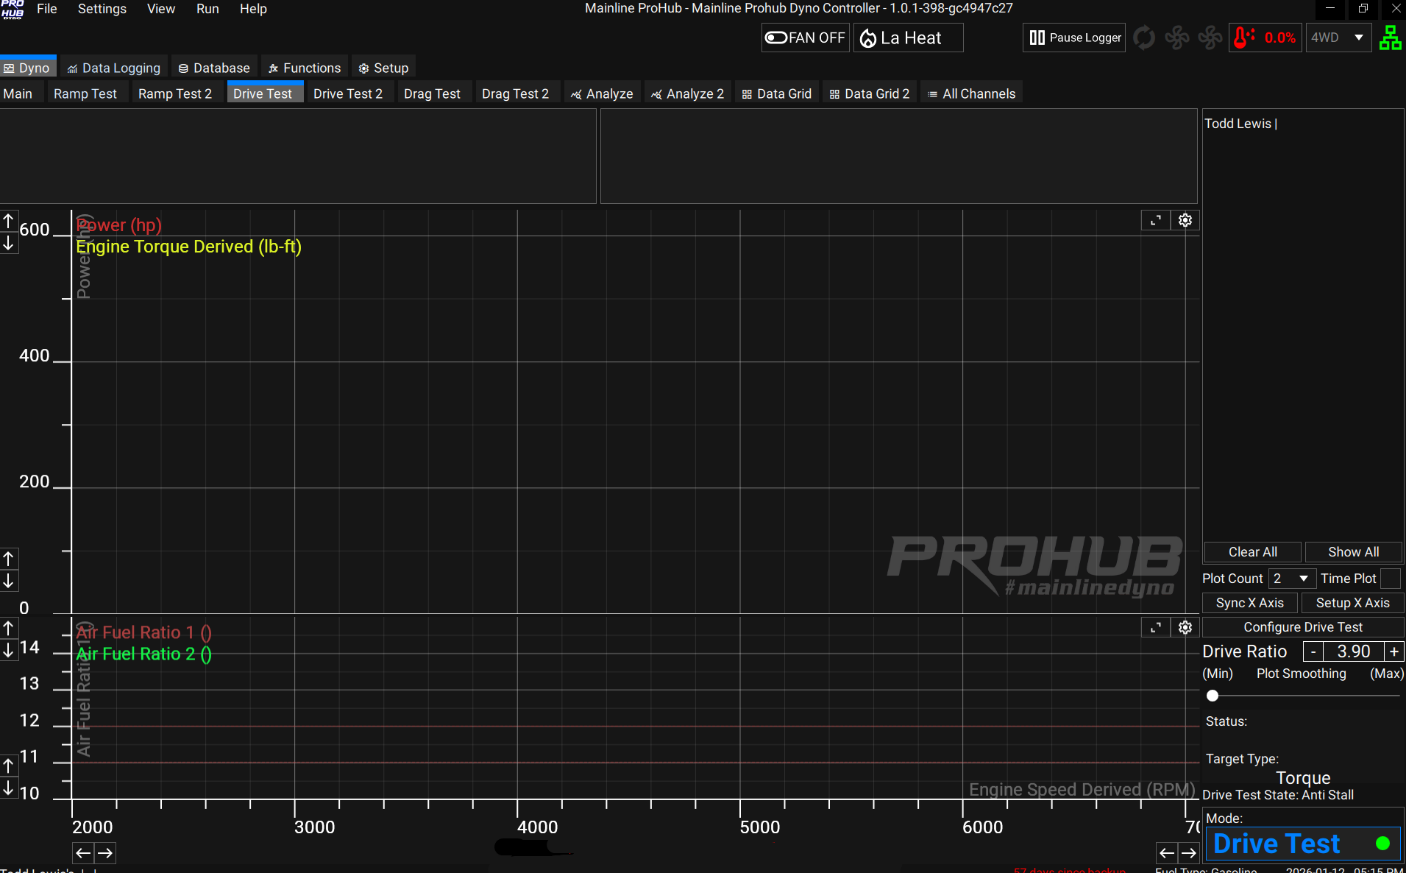
Screen Controls
The bottom right of the Drive Test screen has the following controls:
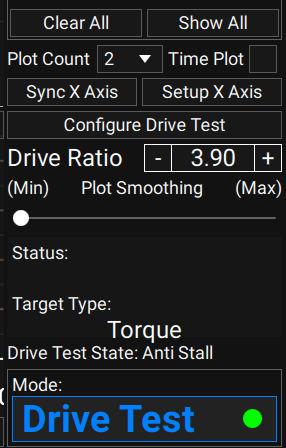
| Control | Description |
|---|---|
| Clear All | Clears all runs loaded in the test window buffer. The maximum number of runs shown is set under Setup → Main → Miscellaneous (1–10). Runs can be a mix of Ramp Tests and Drive Tests. |
| Show All | Un-hides any runs previously hidden via the eye icon next to a Test ID. |
| Plot Count | Number of plot windows shown (1–4). Each is configured via its gear icon for channels and scaling. |
| Time Plot | Shows a Time Plot at the bottom of the test window; channels are chosen via the gear icon. |
| Sync X Axis | Rescales the X axis to the values set in Setup X Axis. |
| Configure Drive Test | Opens the settings window covered below. |
Normal practice is to set the X-axis Start/End RPM about 500 rpm outside the Drive Test’s Start/End Speed, so the entire test is visible on screen.
Configure Drive Test
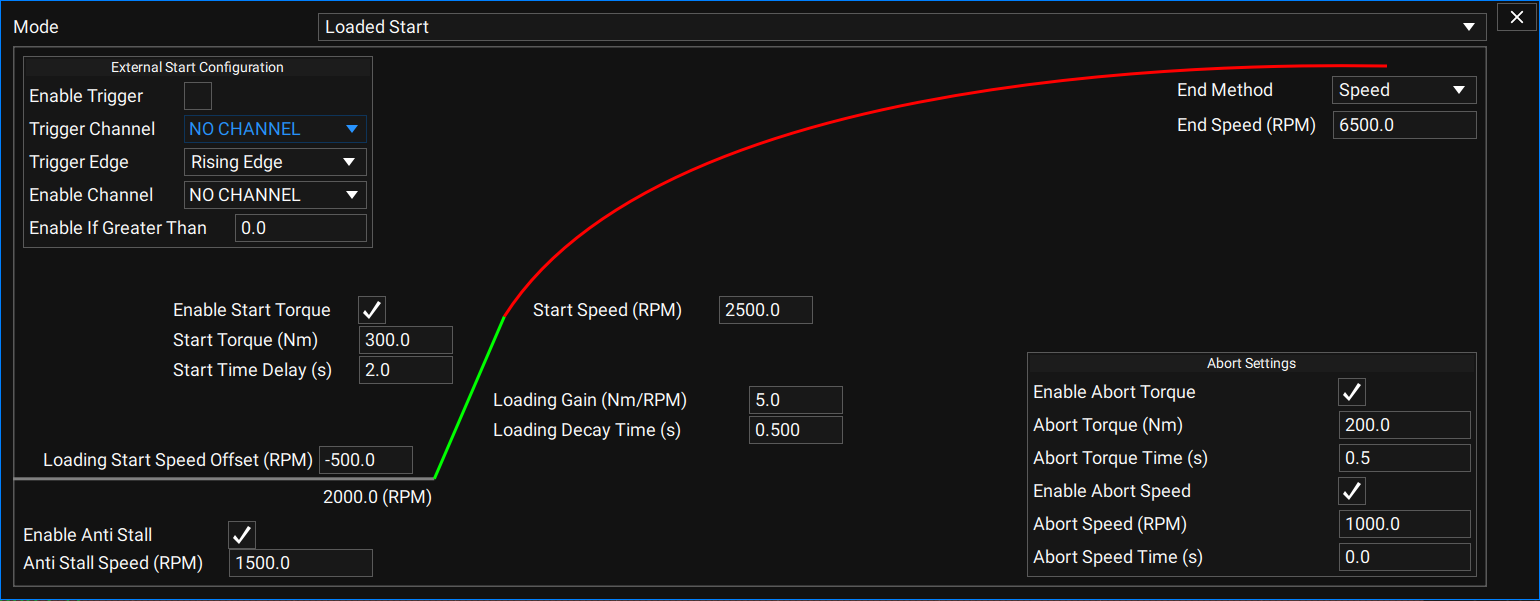
Four basic settings need to be set: Start Speed (RPM), End Speed (RPM), Start Torque (Nm), and Start Time Delay (s).
- The dyno applies load starting around 500 rpm below the Start Speed, and keeps applying load until the Start Speed is reached.
- Once Start Speed is reached, the Start Time Delay activates — typically 2–3 seconds — to allow the driver to progressively reach wide open throttle.
- Enable Start Torque sets the axle torque that must be attained before the Loading Start Speed activates.
Unlike a normal Ramp Test — where the operator taps the space bar to initiate, start, and end the test — Drive Test mode initiates automatically once the start conditions are met, then starts after the timer counts down.
Because load in a Drive Test depends on how much power the car makes (based on the vehicle Mass entered under Database → Vehicle), the car will “ramp” quite differently to a traditional Ramp Test. It can take a few runs to get a feel for how a Drive Test starts and performs — the operator needs to reach and hold a certain torque level for the timer to count down and the test to start.
The same loading algorithm is used in Drive mode on the Main page, so you can practice there at any time: drive up to, say, 4th gear, roll into wide open throttle, and you’ll effectively be doing a Drive Test.
Engine RPM and Torque Converter Slip
The CCS system operates in Engine RPM. Start and End Speed values are calculated from the Drive Ratio entered in the Vehicle Setup tab (or entered directly on the Ramp screen).
Important: Start/End RPM values are only valid with a correct Drive Ratio and a manual transmission. If the vehicle has an automatic transmission without a lock-up torque converter, the Start/End Speed RPM will not match the actual Tacho RPM measured by the dyno or an external ECU logger, due to torque converter slip.
If a tach signal lead is connected, or a CAN RPM channel is set up and received by the CCS software, converter slip can be evaluated directly. There is at least one built-in Maths Function showing a converter slip calculation — the expression can be copied to build a converter slip channel for ECU RPM.